Showing posts with label Essie. Show all posts

Wednesday, March 1, 2017

Tufts and Pearls

Day #2 of my blogging streak - yay! Although the next post may be in a few more days because I'm still wearing this on my hands. The pearls are staying strong even after my scorching hot marathon showers.

Artificial lighting
I used Essie's Lilacism for the base colour. It may be due to the age of the polish but it is nowhere near as lilac as it used to be. Personally, I think it's matured to a very nice pale blue.

Natural lighting
The tufted pattern is done using a MoYou stamping pattern in their Pro XL Collection - Plate 02. The polish is the silver stamping polish from Born Pretty Store (hyperlinked again).
Second from the left in the top row
 Stay tuned, y'all!

Monday, February 4, 2013

An explosion of dots somehow adds up to a fish

I've always wanted to try some sort of fish scale nail art and since my creative mind functions completely different to a normal person, I ended up with a whole bunch of dots vaguely resembling fish scales.

For the base, I used 2 coats of OPI Alpine Snow (Matte) that I've never managed to pull off on its own because it is just such a terrible polish with the worst consistency and streaky texture. But it came out reasonable after I whacked on a layer of OPI Funny Bunny, one of my all time favourites (as you can tell because it's half empty, I mean is that even possible for a polish junkie?).


And here comes the rest of the gang! A whole lot of Essies and a Milani, featuring (from left to right) Splash of Grenadine, Smokin' Hot, Lilacism, Mint Candy Apple, Mesmerize and finally, Key Lime Shine.


I started dotting in the colours from the base of my nail, working my way up to the tip. At first I blotted each colour onto a piece of paper and worked with a wooden skewer, wiping off after each dot. But then I realised that it is so much easier just blotting using the brush of the bottle.

And ta-da! The final result of my experiment process.


I still haven't decided if I actually like the result or not but the thumb seems to look better than the other fingers. It was definitely quite a messy process with 2 hours spent on dotting. But I can't wait to try it again with different sized dots and maybe colours that are only varied in shade. Hope this tickles your fancy.

Tuesday, January 8, 2013

Make your polish dry faster: ice water method tutorial

I think by far, waiting for your nail polish to dry is the biggest turn off when it comes to changing manis. You can't do anything during that time! Even the slightly bump can ruin a perfect polish job.

Today I bring to you, wait for it, drum roll please... A tutorial on using a bowl of icy water to dry your nail polish in under 15 minutes (I also had in total 6 layers of nail polish: 1 base, 4 polish, 1 topcoat). And I should add, I slap on really thick layers of polish each time.

Step 1
Before you dive into painting your nails, get the water and ice ready. There's nothing worse than ruining your nails before you even got to dry them. You'll need a cup of ice, and half a bowl of tap water.

Step 2
Add the ice into the bowl. Be careful because I got splashed.

Step 3
Watch the ice starting to melt already! Now you can start painting your nails. On a hot day, it'll still take the ice 30 minutes to melt away completely. So don't rush yourself. Slow and steady wins the award of perfect-no-clean-ups-needed-manis.

Step 4
Make sure to always put on topcoat. I waited around 1 minute after my layer of topcoat, then plunged my fingertips into the bowl of icy water.

The rule is:
Alternate every 15 seconds for each hand. Otherwise your fingers will feel like they're going to freeze off. Repeat each hand 4 times so it adds up to 1 minute per hand. 2 minutes in total.

You can dry your hands off afterwards but make sure to avoid your nails. My polish was dry to touch in 5 minutes' time after taking them out of the water. The most amazing thing is that they're pretty much indestructible after half an hour! As opposed to my normal 2 hour wait because I like thick layers.


Check out the result! I used Essie Lilacism. It is such a gorgeous cool shade for summer.


Like they say, time is money. I've just saved myself a lot of money.

Thursday, August 23, 2012

Sponge nail art: Mini tutorial for gradient nails

Sponging is one of the fastest and easiest way of creating amazing nail art designs. Galaxy nails are usually done through this technique. My favourite, though, would be gradient nails because the porous texture left by the sponge makes blending super duper easy.

Feel free to click on the image below to enlarge the tutorial.


 I like to cut up my make up sponge into smaller bits so I'm not wasting it. I'm pretty sure that kitchen sponges would also be fine. Another great tool is the spongey eyeshadow applicator. Make sure to gently dab off any excess before dabbing the colour onto your nails. I like to dab on the tip colour first then go back and dab on a bit of the base colour if the tip is too overwhelming.

The trick is actually not to worry about being messy or too fussed about the bumps left by the sponge while you're dabbing. A layer of topcoat will fix everything down with a super smooth surface.

The end result:

Base colour: Essie Splash of Grenadine
Tip Gradient: OPI Dim Sim Plum


You have no excuse not to have gradient nails. I will take over the world, with a sponge at a time.

Saturday, July 7, 2012

Muted pink

I love matte. Sometimes it is just too garish to wear colours that are practically neon.


Base colour: Revlon Fuchsia Fever. Top coat: Essie Matte About You.

I am definitely "matte" about matte. Ever so punny.

Doubly bubbly

Once upon a time, there was a little girl who loved rhinestones. But evil top coat polishes decided to dull the sparkle of her beautiful, shiny rhinestones. She had no choice but to wear the lustreless rhinestones in shame with hidden frustration. One day, she made an amazing discovery! Pearly finishes will not be destroyed by top coats. She set off to work immediate.

This is the result. Base colour: Essie Over the Top.


I had even managed to take a photo of my right hand. DSLRs are really really heavy.


That hopeful little girl is still yet to discover the perfect top coat that won't dull her rhinestones.

Midnight garden party

I can't believe it's been so long (over half a year) since my last post. I'm so sorry! No-one probably reads this anymore, which makes me feel even more guilty about it.

I haven't stopped painting my nails. It's just that it doesn't happen very often anymore, because my course is still a killer.

I remember almost 2 years ago, I bought quite a few packets glow in the dark stickers. But I've never been a fan of floral stickers because over the top rhinestone blings had always seemed to come out on top (I'm so punny).

These babies in action!


What it looks like the other 99% of the times. Base coat: Essie Something Borrowed. French tip: OPI Suzi Says Feng Shui.


I'll be uploading again real soon!

Sunday, September 4, 2011

Nailling tattoo

The fact that the felt tip pen has not left my hand since the beginning of this semester has gotten me thinking about how I can somehow make that into a nail art tool. I remember a while back, I posted an entry where I had used a biro pen to draw on Essie's Matte About You matte topcoat. A felt tip pen is much inkier and doesn't dig into the nail polish surface, making it an accident-proof nail art pen.

So with the "how" solved, my mind wandered towards Chanel's temporary tattoos. I've always wanted to get my hands on them ever since I had heard about them early last year but common sense prevailed.

Enough of my blabberings, I'm quite excited to share with you what I think is a rather good turn out for a design that is so completely spontaneous, inspired by Chanel.

The base is 5 coats of Zoya's Angella. The polish is one of those sheer pink-tinted iridescent pearls. I personally dislike sheer nail polishes because it justs really troublesome appearance-wise when yucky things get caught underneath my nails like glue (blame my course), food (think rainbow sprinkles) and moisturisers. With an excessive 5 coats, the finish is semi-sheer under certain lights and almost opaque in dimmer environments.

Instead of Essie's topcoat, I decided to try out China Glaze Matte Magic's ability to withstand my crazy squiggles. Rather impressive, actually. I've been rubbing on my nails while exerting quite a bit of force and the drawing is yet to budge.

Here's the basic precedure that I had followed to create this:
1. Basecoat (always always always, I absolutely cannot stress this enough).
2. Base colour (in this case, Zoya Angella).
3. Matte topcoat.
4. Attack your nails with whatever pens and colours you've got handy. I've yet to try it with gel pens.
5. After the pen drawing is dried, seal the design with another layer of matte topcoat, or normal, depending on the finish you're chasing.

To my surprise, the whole process had taken less time than a normal manicure since matte topcoats dry in a flash, even faster than those polishes that claim to "dry with in 60 seconds (liars)". This is so much cheaper than those Chanel tattoos and just as effective, in my opinion.

Sunday, August 21, 2011

Haul-lo from the U S of A

I marvel at my extraordinary ability to make dodgy puns.

America was heaven for a nail polish addict like me when compared to Australia. I live in a hole. That's my conclusion. Why does the stupid island of a continent have to double the price for everything? I've found so many 'old' polishes that I've been craving for heaps long like Lincoln Park at Midnight in Nordstrom Rack for just $8 a bottle. Absolute Bliss, with a capital B.

I really want a DSLR. The quality of the photo is so very different, in a good way, of course. Compare this photo taken with my friend's DSLR to the terrible photos from my dummy point-and-shoot camera.

The bottles look so shiny and the colours look so true! So on the top row of Essie from left to right: Silken Cord, Splash of Grenadine, Lilacism, Borrowed & Blue, Smokin' Hot, and Over the Top. Bottom row of OPI and Orly from left to right again: Malaga Wine, Lincoln Park at Midnight, La Playa, Royal Navy, Pure Porcelain, Winter Wonderland, Stranger Tides, and Mermaid's Tears.

There are also OPI's Lucky Lucky Lavender, Suzi Says Feng Shui and Russian Navy, plus Sephora by OPI's Queen of Everything and Spark-tacular! that somehow I had forgotten to photograph. Great memory I've got there.

This haul definitely saves me from making that agonisingly long trip to Bankstown.

Tuesday, March 29, 2011

Haute for polka

I've had Essie Haute as Hello sitting on my shelf for ages. I kind of forgot that I had it because I've always thought that it was a warm-orangey colour and those colours definitely do not flatter my already very yellow hands. Boy was I wrong.
Essie Haute as Hello is a light coral that is almost neon in colour. Because of this, the polish itself dries in a semi-matte state that is rather sheer (requiring at least 3 coats but I got lazy and managed to get away with only 2). Polka dots and random cloud-like shapes seem to do the job of disguising the slight uneven streakiness.
I love how this polish is both warm and cool at the same time, almost like a neutral shade that is able to accomodate just about any skin tone. You're more than welcome to prove me wrong.

Monday, March 21, 2011

Diamonds in the air

First up, I'd have to apologising for not posting since over 2 months ago (dear oh dear). As a very bad attempt to justify this uber long period of inactivity, I'd have to blame China because that country has blocked just about everything that is even remotely entertaining. No Youtube, no Twitter, no Tumblr, no Wordpress, no Blogger, no Facebook and just about every other 'social' sites.

Now let's get onto the more important things. I've been feeling very lazy lately. I'm still not used to uni's insane workload. I also had to cut my nails extremely short while I was in China because somehow my nails just kept on breaking, so I don't want to show the world my bald fingers. My nails are now finally at an acceptable length! I had to do something to celebrate, right?

I used 2 coats of China Glaze Light as Air because I haven't gone nail polish shopping in quite a while and I've used up every single colour because I am that deprived oh wow I'm rambling because I am that sad and now how many "because" have I said? So I don't know why but it ended up being kind of streaky. Had my nail painting skills deteriorated? So what better way is there to cover up streakiness than with plenty of glitter (Essie Silver Bullion)?
I couldn't help decorating my ring finger since I haven't done a proper nail art in ages. I regret not doing the whole manicure in it as personally I believe it had turned out pretty darn good. I promise to update again this week so stay tuned!

Monday, December 27, 2010

Put a rose in your cheeks

Sydney's weather is really whacked up this summer. Summer feels nothing like summer. Today was such a gloomy day. In order to cheer myself up, I've decided to jump on the floral train, although I am a bit late in joining the parade.
I used Essie Mint Candy Apple as a base. Surprisingly, it only took 2 coats, considering normally Essie requires 4-5 coats for complete opacity. I'm the sort of person to stick anything and everything onto my nails. The flower on my ring finger is actually made out of paper and meant for scrap booking and other non-nail art purposes. I can't help myself. Topcoat is the solution for everything. But the flower is really getting on my nerves now. I can't even seem to wash my hands properly with that attached. I really shouldn't have used so much nail glue.
The little flakey thing on my ring finger is the residue of the nail glue that doesn't want to come off no matter how hard I scratch at it. I'm not sure if you can see but the flowers are drawn using white over pink. It was absolutely agonising repeating the same process on my right hand.
Personally, I think this is rather successful considering that I very rarely draw roses because I know that they would also turn out looking like squished bugs. I've surprised myself this time. I hope this will bring back the warm and sunny summer weather.

These roses could also be painted using acrylic paint and topped off with a layer of topcoat. Acrylic is much easier to handle as they can be washed off with water and does not dry as quickly as nail polish so things can be altered if mistakes are made.

Tuesday, October 19, 2010

I'm still alive

I haven't blogged in quite a while. Yes, I'm still painting my nails during this time. Even though the HSC is a (the word that rhymes with itch), the nail polish fumes are keeping me sane. You should've seen me during the last week of the holidays without nail polish. I'd like to thank the two Shirleys for putting up with my insanity during that agonizing period. I'd also like to thank Vivien for the lovely post, I hope you're painting your nails while you're reading this. This is beginning to sound like one of those award speeches so I am going to stop before I throw up in my mouth.

After the Belonging Paper, I painted my nails. I've reworked the Ruffian moon and made it look more like the "real" thing, whatever that may be. I used 3 coats of Colour Club Worth the Risque as base. This is a holographic nail polish that turns into disco balls in the sun. I love it. Although I failed to capture it because my home only sees the sun during the morning (I'm usually asleep during that time). This will all change when I move in a month's time! I'll be sure to take a photo the next time that I wear it.

After the base colour had dried, I used manicure guides on my middle and ring fingers but free handed the rest with Revlon Black Lingerie, then Essie's Matte About You finishing topcoat. I like the free hand effect better. I'm sure you'd agree.
I don't know if it is Essie's matte topcoat's fault for my own fault for not leaving the black to dry completely before whacking on the topcoat, the matte seems to work better with China Glaze Matte Magic. I should do a comparison later.

Go paint your nails. If my left hand was coordinated enough to free hand a Ruffian moon, then you should have no problem painting both hands.

Tuesday, October 12, 2010

It's coming...

Yes, you know what I mean: the much dreaded HSC is coming in 2 days. My procrastination level has reached 99 and is ready to transcend to the ultimate epic. I also haven't blogged in a week. I honestly had nothing to blog about.

Remember my promise not to touch my nails until the HSC? Well I couldn't resist. I mean, there was a massive chip! What else am I suppose to do? Just leave it? I don't think so. The gold mani did last over a week, thanks to Revlon's topcoat. I discovered the chip after I washed the dishes (with gloves). I was pretty "grr" about it. But it gave my an excuse to paint my nails again, I guess. All's well ends well.

Other than the great big chip on the index finger of my left hand, my nails were pretty much perfect. Very faint tip wear was visible but that was probably one of the longest lasting manis ever. Look, I even circled the chip for you. What really scared me was how much my nails have grown in just 1 week. Look at the massive gap between the polish and my cuticles! I think I owe it all to Lush's Lemony Flutter. I feel a review coming soon.
The glitter wasn't as difficult to remove as I had imagined. I got to drool over Channing Tatum's hotness on TV while I scrubbed my nails. Overall, it was a pleasant experience. Then I finally got the chance to paint my nails.

I used OPI Happy Anniversary. It is extremely sheer with a frosty-foil finish. The finish I feel is very similar to OPI Glitzerland, just more frosty. However, it took my 5 coats for a relatively opaque result. I would pile on more but I didn't want to suffocate my nails. I then added 3 coats of Essie Silver Bullion, a silver glitter topcoat. So altogether, I had 9 layers of nail polish on each nail (including basecoat and topcoat). I forgot to take a picture of OPI Happy Anniversary on its own but the result is pretty much the same as what I'm about to show you.
I like how dreamy this photo looks. Matches the end result which is very dreamy yet sparkly. It is hard to describe. It kind of reminds me of the Snow Queen. So clean and pristine but with a magical twist. Here's another photo of the same thing but with better details.
The glitters really come through. And a close up for good luck.
My index finger is looking very ugly at the moment. I guess I'll just have to wait for it to grow until it looks normal again. I think I might call this "Winter Wonderland" just to be cliche.

Wednesday, September 22, 2010

Ruffian moon manicure tutorial

I've noticed that there is a current trend in "Ruffian Moon" manicures. Creative Nail Design, otherwise known as CND is leading this trend with several variations of this manicure style. I was inspired by these 2 examples:
I do not own this image. Credit to source.
I do not own this image. Credits to source.
So I've decided to create a simple tutorial for creating this stylish look.

If you remember my Channelling Chanel entry, I talked about using french tip guides that can be purchased on Ebay for next to nothing. Well, great news! I've found an even cheaper method that eliminates the shipping time: hole punch reinforcement stickers! They can be found in all news agencies in the stationery section. Now gather them and cut them in half so one ring can be used twice.
Paint your nails a base colour. I wasn't bothered to make the whole thing perfect becase only the bottom of the nails will be seen. I've used 4 coats of Essie Pound Cake at the bottom. It is a light nude that leans towards greige and has a slight pink tinge. I would definitely paint my walls this colour. Looks so refreshing.
As you can see, the tips are not properly painted. This did not affect layering in any way. Apply a quick dry topcoat or wait for as least an hour for the polish to dry properly so that sticking wouldn't ruin the base. Get your semi-ring. Stick it on the palm of your hand to remove the excess stickiness. Stick it onto the bottom of your nail and make sure the semi-ring is stuck firmly to your nail otherwise bleeding will ruin everything.
I applied OPI Dim Sim Plum to the top half of my nail. I got a perfect coverage with 2 coats. I then applied China Glaze Matte Magic Topcoat for an extra twist.
Remove the semi-ring when the top half is almost dried. Check out the final result.
I'm pretty happy with it seeing that this manicure was so quick, easy and cheap to do. Those reinforcement rings would also be perfect manicure guides. Maybe some glitters would spice things up a little more. Go nuts!

Sunday, September 19, 2010

Guilty pleasures

Attention: Any hint of arrogance present in this entry automatically translates to pride and pleasure.

Now that's out of the way. I am proud of my nail polish collection. Like any proud parent, I would like to see my babies grow and expand. Hopefully I would eventually reach the 1000+ mark. Sooner than later, I hope. There are so many more colours, finishes and textures that are still waiting patiently for me to discover them. I guess this is the purpose of this blog. To help you to discover something wonderfully new, whether it be an idea, a colour, or another way to procrastinate during the vital HSC period. I do feel rather sentimental today.

I really need a nail polish stand. A place to display my nail polish for easy access. Currently, they occupy one shelf on my downstairs bookshelf because that is the only place where the sun cannot get to. Sunlight + nail polish = bad. So don't ever store your nail polish where the sun can get to it. My other nail art supplies are stored in random shoe boxes under my coffee table. I hate it. I want a cupboard didicated to nails. Space is always an issue.

I think I current have 70-ish bottles of nail polish. I remember counting but not the number. It is a pretty pathetic number, I do have to admit. But a girl only has so much money to spend. I arranged them according to brand. I like the look like matching bottles. Since I have no life, I'll name every single one for you.

OPI:
Top row from left to right: Girls Just Want to Play, Dim Sim Plum, Chapel of Love, Mod about You, Happy Anniversary, Alpine Snow (Matte), Funny Bunny, Banana Bandana, Glitzerland, Bling Dynasty, You Don't Know Jacques, My Private Jet
Bottom row from left to right: Jade is the New Black, What's with the Cattitude?, Ski Teal we Drop, Yoga-ta get this Blue, Brand New Skates, Sheer your Toys
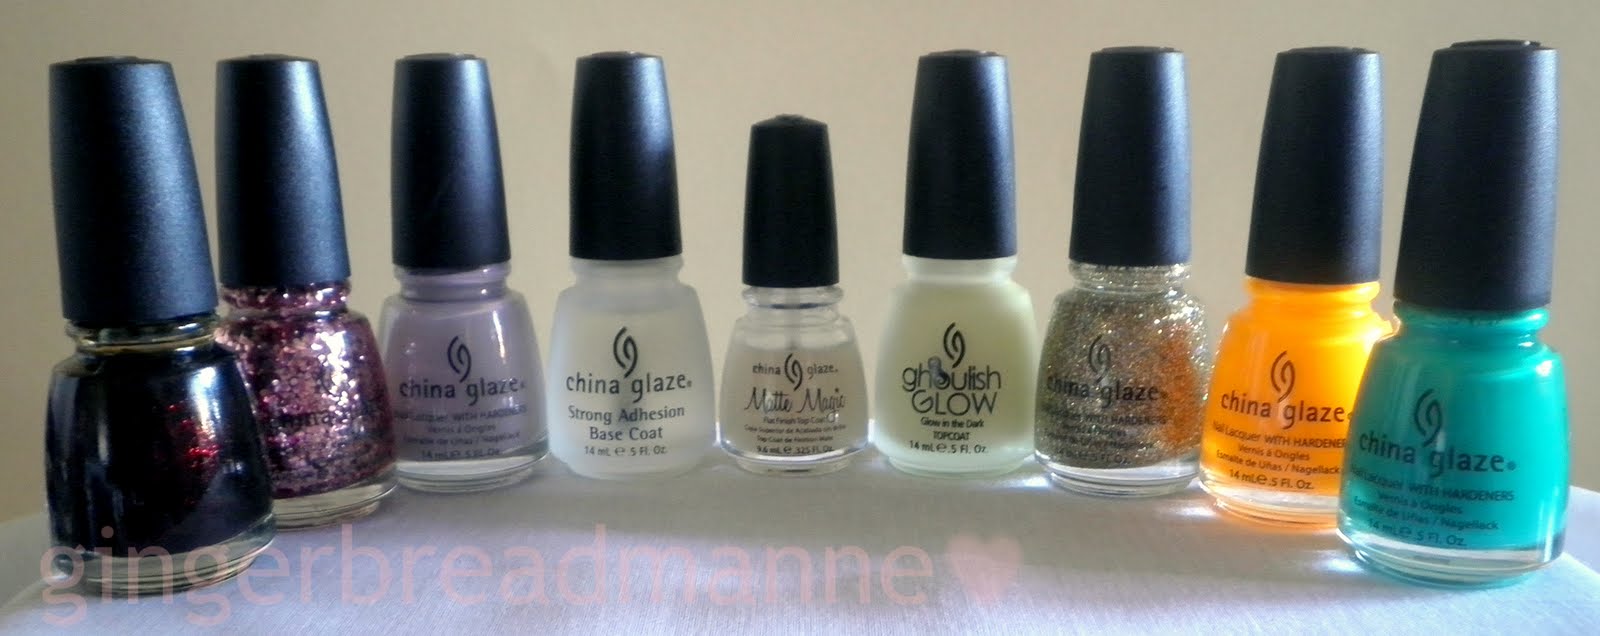
China Glaze: Lubu Heels, Doll's House, Light as Air, Strong Adhesive Basecoat, Matte Magic Topcoat, Ghoulish Glow Topcoat, Medallion, Sun Worshipper, Four Leaf Clover
Essie: Matte About You Topcoat, Haute as Hello, Pound Cake, Playa Del Platinum, Silver Bullions, Mint Candy Apple, Mesmerize
Revlon: Quick Dry Topcoat, Black Lingerie, Primal Purple, Fuchsia Fever, Franken (used to be Cherry Crush), Franken Squeaky (used to be Grape Shimmer), Franken (used to be Copperglaze Platinum)
Zoya: Ivanka, Gilda, Savita, Get Even Basecoat
Nubar: Sour Candy, 2010 (G188), Pasadena Purple
Milani: Key Lime Shine, Blue for my Baby
Colour Club: Worth the Risque (yes I bought 2 bottles, they were on special)
OPI mini: Tattoo You Want Candy?, I Love Mummy, Witch Arm?, Glow-ink the Dark
Orly: Fantasea
Bloom Seoul, Sally Hansen Nail Hardener, Kami Nail Foil Adhesive
Here are the under $5 nail polishes that I don't feel safe using anymore because they are packed with chemical goodness. So I use them extensively on fake nails. The colours are still wonderful though.
I can't wait to take another trip to Bankstown. I really want to expand my Essie and Orly collections so they can grow to compete with OPI for my love. I would also love to get my hands on more Zoya but Ebay is currently the only 'affordable' way of getting them. They still cost on average $12 a bottle when the exchange rate is high. I'll shut up now. Thank you for reading. I'm off to make a wishlist.